Use case of the ![]() range of printers used to print moulds dedicated to plastic injection.
range of printers used to print moulds dedicated to plastic injection.
The French manufacturers of professional 3D printers eMotion Tech, and of manual injection moulding machines Holimaker have joined forces to demonstrate that synergy is possible between the additive manufacturing and injection moulding sectors.
- What was the main goal of this partnership?
The main goal of this partnership was to make viable a manufacturing process for plastic parts based on the combination of two technologies that are still opposed to each other, although they are both part of the same sector of activity, plastic and polymer transformation. Convinced that it is now more than relevant to use additive manufacturing by fused filament fabrication to make injection moulds for plastic parts, the companies Holimaker, manufacturer of injection moulding machines, & eMotion Tech, manufacturer of professional 3D printers, have set up a test process with the aim of demonstrating this use and the complementarity that exists between these two different manufacturing technologies.
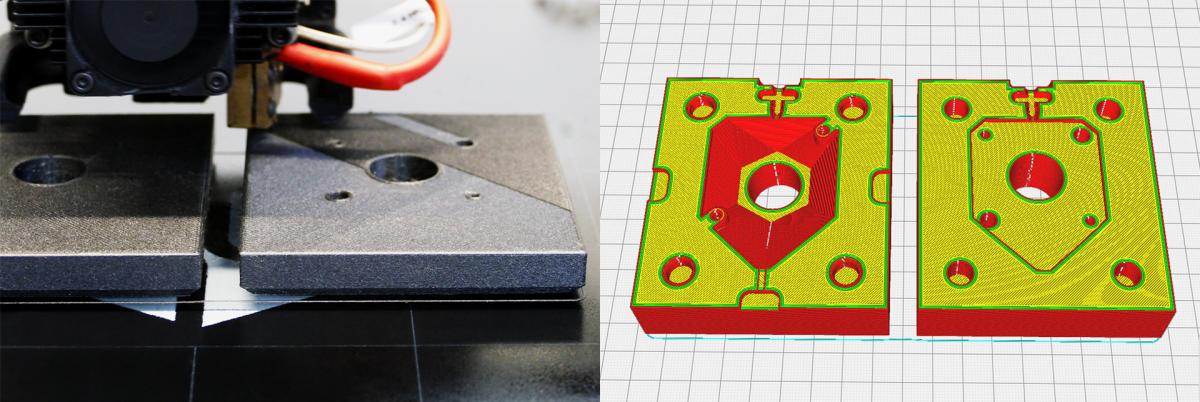
- HOW DID YOU MODEL THIS MOULD (SOFTWARE)?
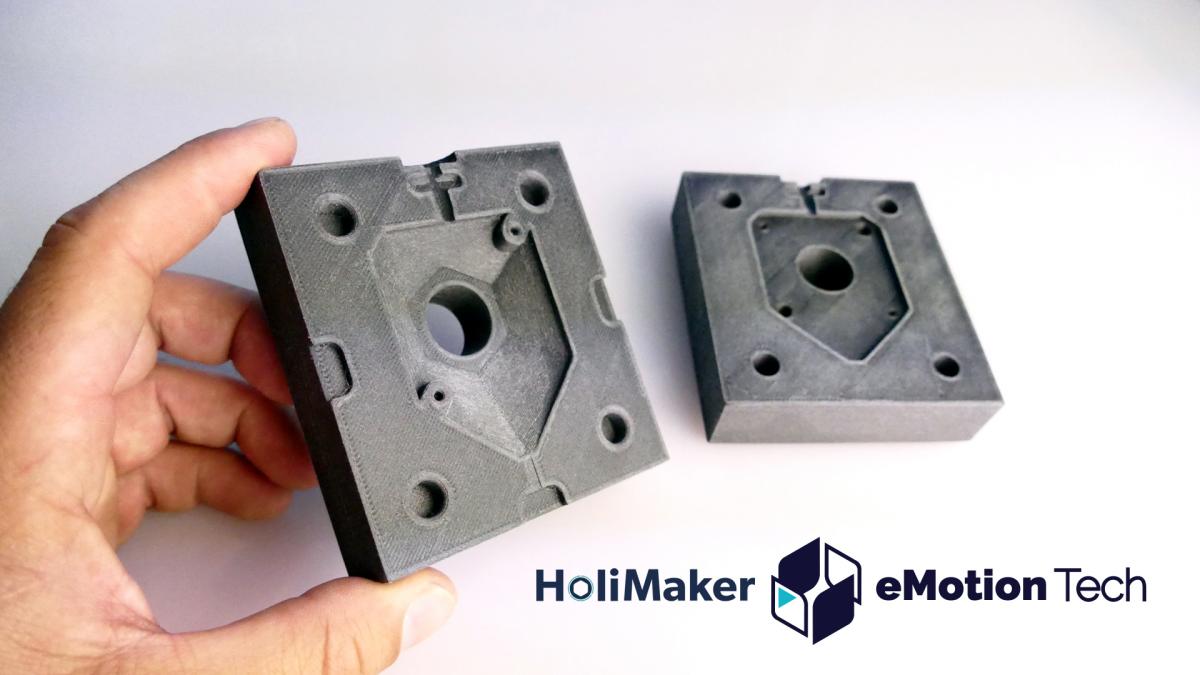
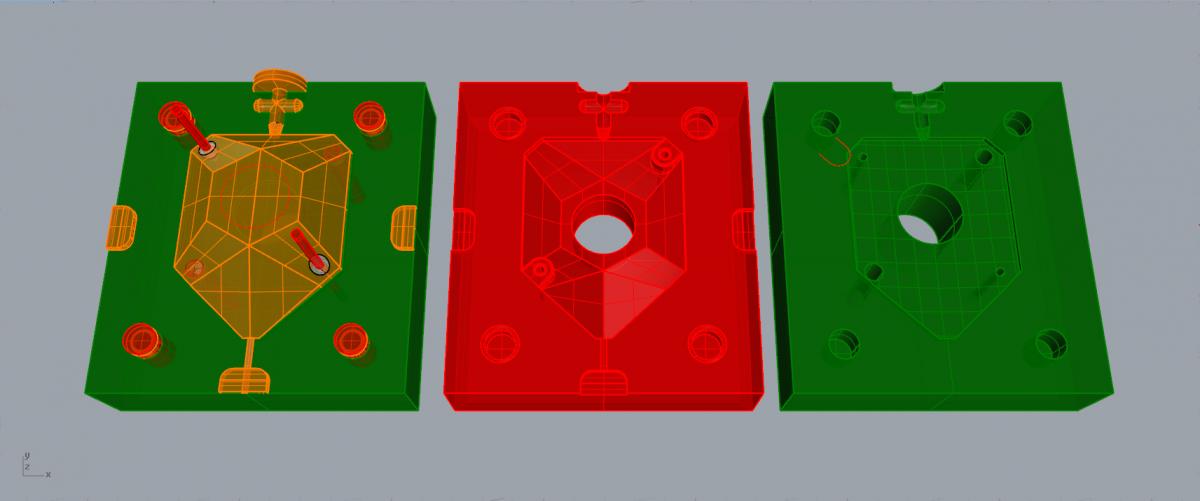
The mould was modelled with Rhinoceros software, but could have been modelled using any professional CAO software. The design of the mould was actually based on the modelling of the desired final part, just as when additive manufacturing is considered to produce a part, except that parameters such as draft angles had to be added to the part so that it could be demoulded effortlessly after injection. Once the part was modelled (here, a calibration camera support of the Strateo3D IDEX420 developed by eMotionTech) a classic Boolean operation was used to draw the shapes and counter shapes in the mould itself.
- WHAT MATERIAL WAS USED TO PRINT THE MOULD, AND FOR WHICH REASON?
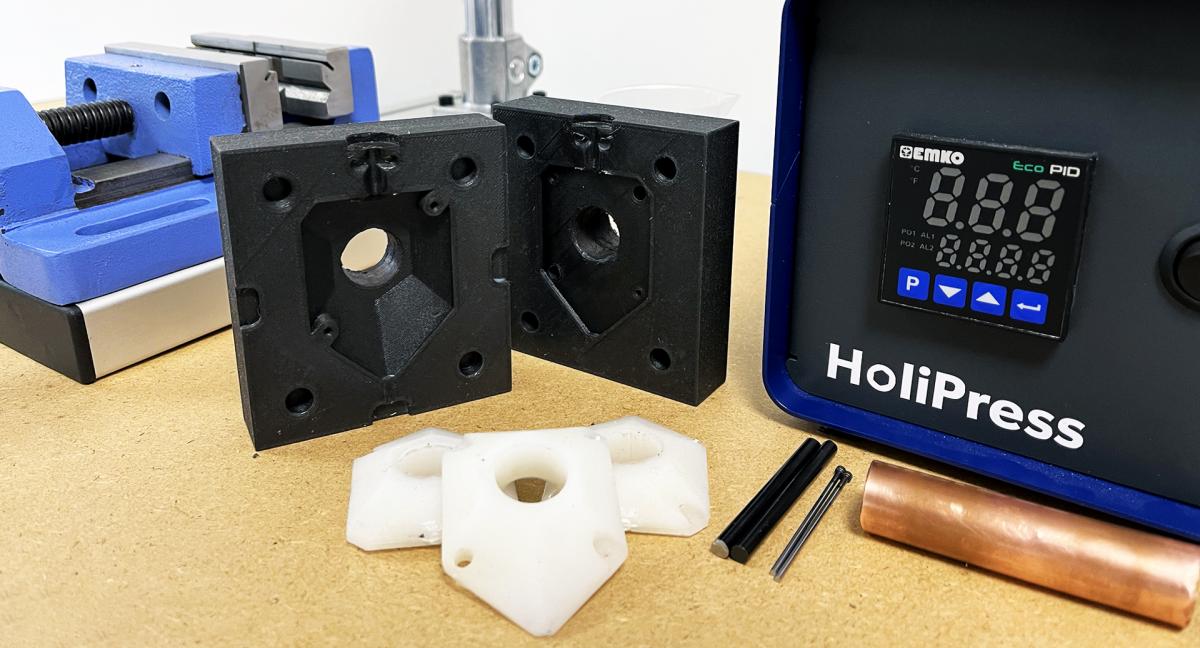
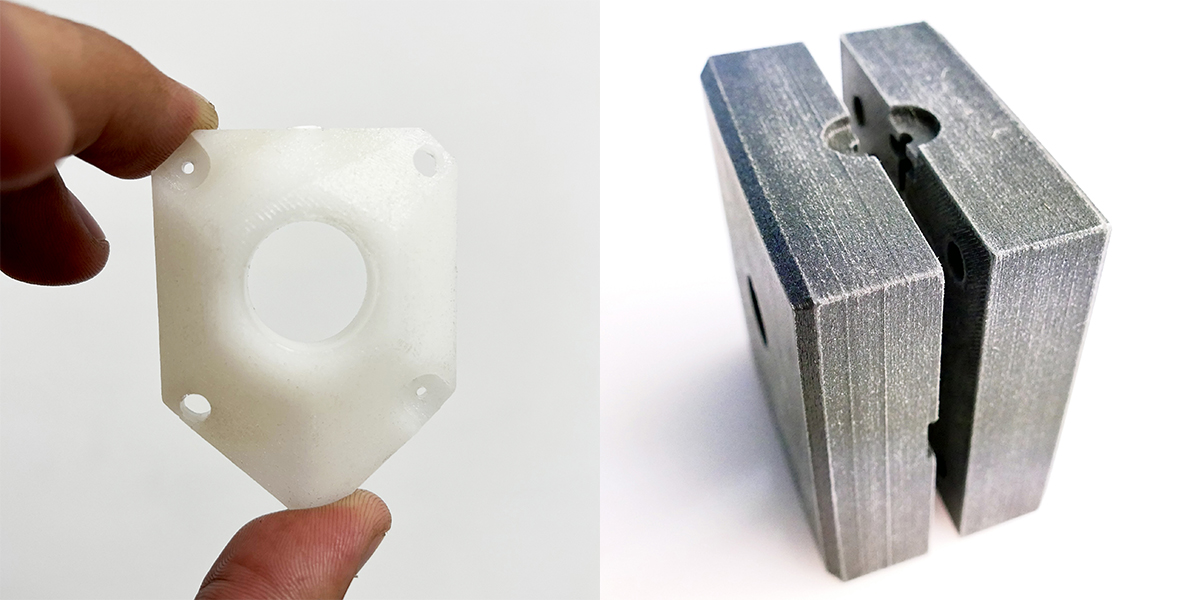
Several polymers were used during this demonstration. We wanted to carry out progressive iterations, starting with the least expensive material and gradually moving towards polymers with superior characteristics depending on the need. Therefore, to inject polypropylene into polymer moulds, it was necessary to use a material that could withstand a temperature of over 140°C. That is the reason why the mould was first printed in Nylon PA66; tests showed that the heat generated by the injected plastic deformed the injection channel of the mould, so this polymer was quickly discarded in favour of a Nylon which was filled with glass fibre (PA6-GF), to increase its thermal resistance. With this material, the mould withstood the heat generated by several injections perfectly, but eventually failed at the points where a strong pull was exerted. We then chose to modify the design of the mould by adding metal inserts in the holes most subject to traction during the withdrawal of the injected parts, and also chose to print the mould in carbon fibre-filled Nylon (PA6-CF).
- HOW DID YOU DETERMINE THE VARIOUS MANUFACTURING SETTINGS (LAYER THICKNESS, POSITIONNING, FILL RATE, ETC…)?
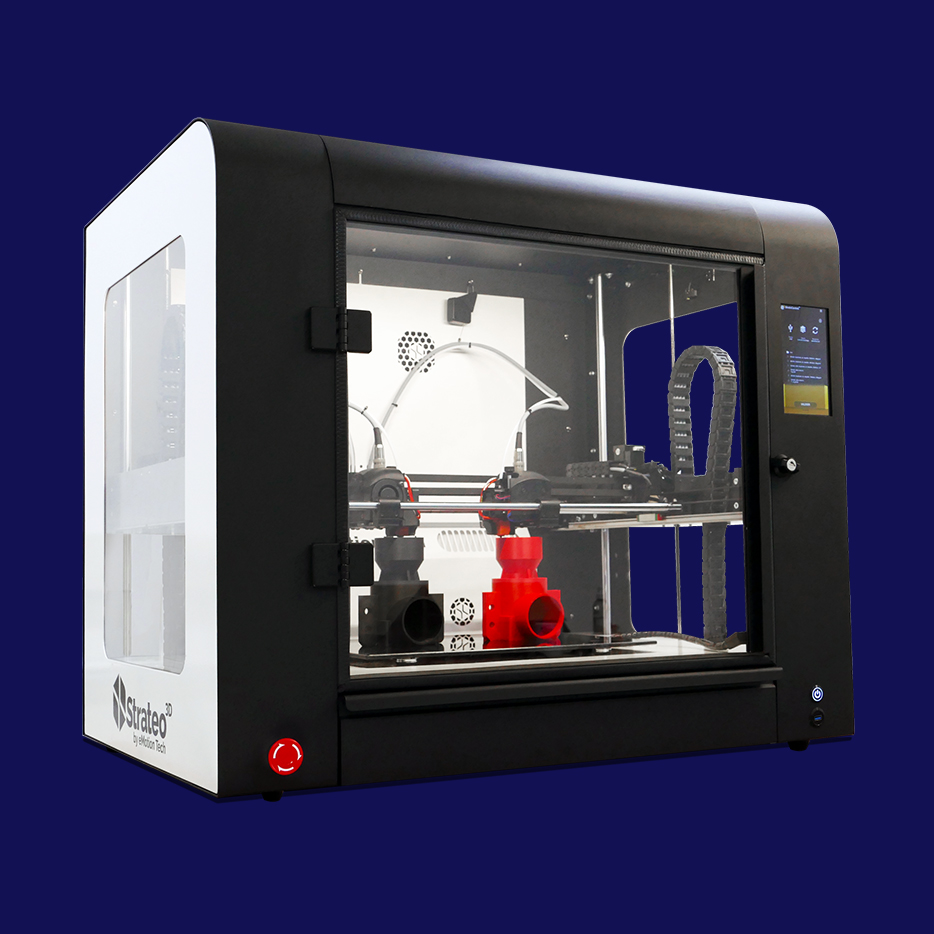
In order to obtain the strongest and smoothest mould possible, we printed the mould with 0.2 mm layer thickness and a 90% infill. The two half shells of the mould have been printed at the same time on the same bed of the Strateo3D DUAL600 as they could have been on the Strateo3D IDEX420. The printing of a complete mould took 37 hours and needed 344 g of PA6-CF Nylon.
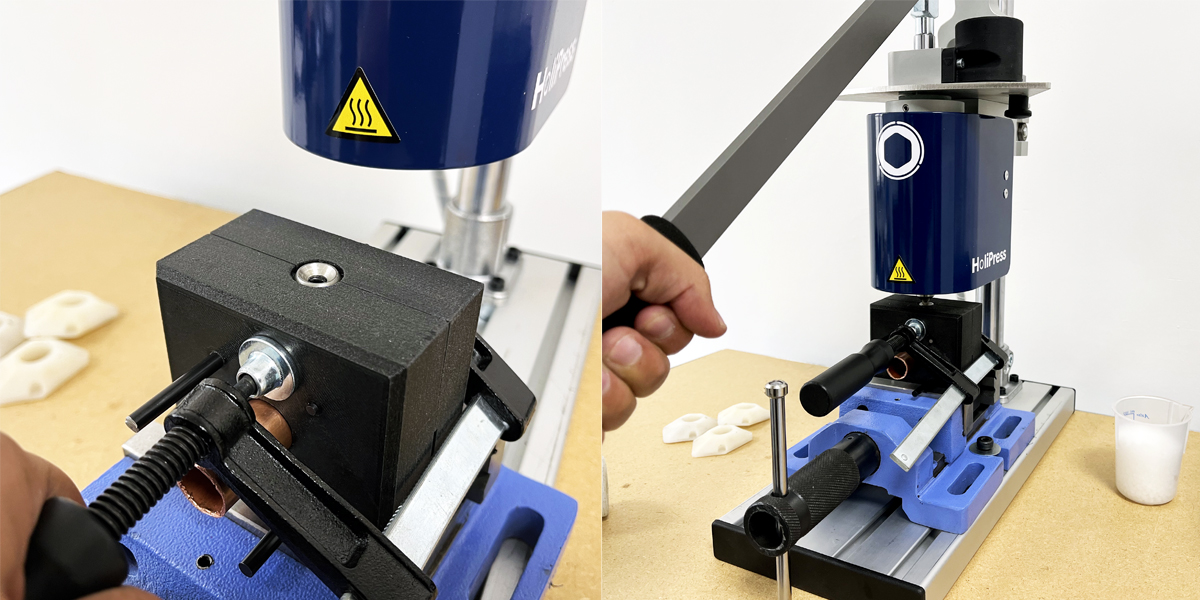
- How the plastic parts were Injected into the mould?
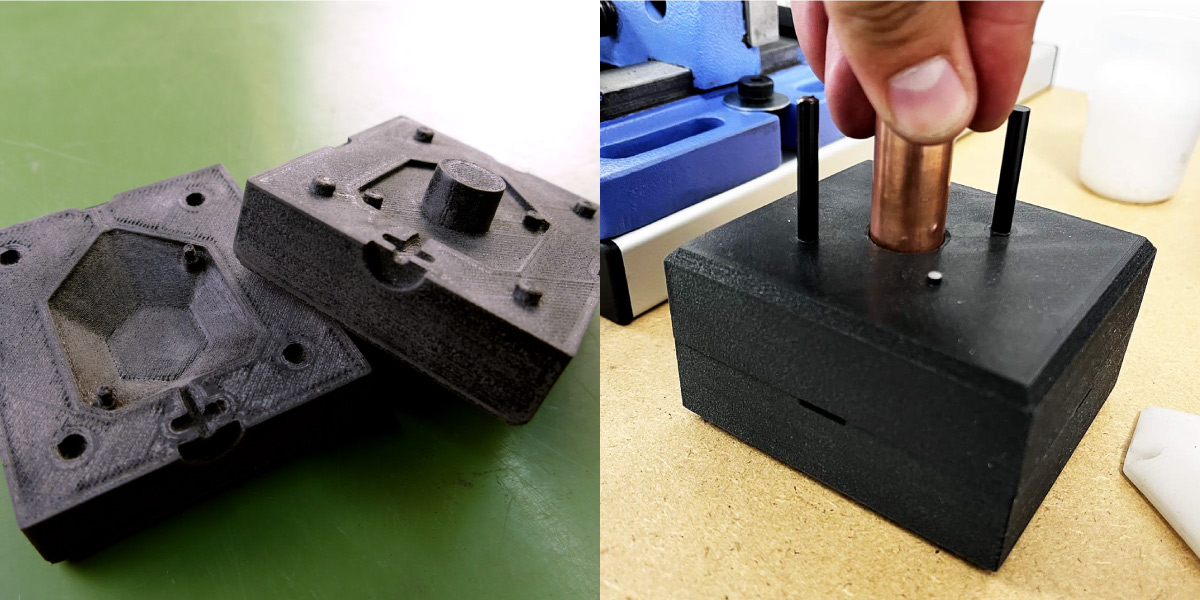
In order to avoid the risk of fusion between the injected part and the mould, it is recommended to apply 2 cross passes of anti-adhesion spray on the 3D printed part that will host the injected plastic. Once the spray has been applied, leave the open mould to dry for at least 2 minutes in the open air. The mould is placed under the HoliPress nozzle in the clamp supplied in the Starter-Pack. In our case, a gasket holder helped to keep the top part closed. A metal spacer was placed on the mould at the intended location to protect it from heat and to prevent the injection channel from melting during injection. Once the mould was centred under the nozzle, the injection was carried out by manually lowering the lever without stopping until the mould was completely filled. The 3D mould is completely filled when the lever can no longer be lowered. Once the lever is lowered to the maximum, this position is maintained for 20 seconds to contain the injected plastic in the mould. Once the injection has been achievedt with HoliPress, the mould is removed from the nozzle and left to cool for at least 3 minutes. When the mould has cooled down, we can open the mould to get our injected part. We can use a pair of cutting pliers to help us remove the part through the injection channel and clean up leaks at the parting line of our injected part if necessary.
- WHAT BENEFITS DID YOU SEE IN USING THE STRATEO3D DUAL600 & THE Holipress to create these injected parts?
For eMotion Tech, untill we considered this partnership with Holimaker we printed the camera support of the Strateo3D IDEX420 on our machine park, but wanted to optimise the production of these parts by printing not the parts but rather the mould and then injecting the part thanks to the Holipress. We have gone from 15 minutes of printing per part to 3 minutes by injecting them. For Holimaker, characterising a manufacturing process for injected parts from 3D printed moulds by fused filament fabrication was a real challenge because it clearly opened up new manufacturing techniques and new markets.
- COULD YOU COMPARE IT WITH ANOTHER MANUFACTURING METHOD (TIME, COST, ETC…)?
Printing the moulds on this machine not only allowed us to make several iterations of the mould at a lower cost, but also to obtain the mould in a few hours, where more conventional mould making technologies (such as machining) would have involved lead times and costs that were at least 3 times higher.
- Conclusion OF THIS PARTNERSHIP:
It is obvious that making injected moulded parts from 3D printed moulds brings flexibility in terms of production time and costs. After these injection tests, it must be admitted that the moulds printed with PA-6CF Nylon do not allow the production of as many copies as if they were machined in aluminium, but enough to be profitable compared to the production costs of machined moulds , since about 50 copies of this camera support could be injected into the printed mould before the mould started to deform.
Alban DESBARAX, Art director, eMotion Tech & Vivien SALAMONE, Marketing manager, Holimaker,
Download the use case (*.pdf)
You are interested in printing moulds for plastic injection,
Here are below the references used for this use case.
Strateo3D IDEX420
eMotion Tech
from 6990 € exc. VAT
PolyMide PA6-CF
Polymaker
54,99 € HT

Holipress
Holimaker
from 2580 € exc. VAT